Stampin’ Up’s Bloomin’ Love Valentines Card

So I am staying with the Valentine’s theme for today’s card. Recently one of the lovely ladies in our team came up with the idea of a card swap amongst ourselves, so we each had someone to send a card to. What a great idea!! It gives us such an inspiration boost and plus as the theme for this months swap was Valentines my husbands face was a picture when I opened up a Valentines card!!

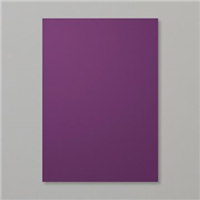
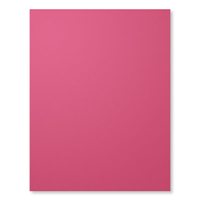
So on with the card. I wanted to do something a little different so I got my card swatches and chose two very different colours that I normally would not go for or put together. I used Blackberry Bliss A4 Cardstock for my base cut at 4 1/8 inches and scored at 5 7/8 inches. I then added a mat of Pink Pirouette A4 Cardstock measuring 3 7/8 inches x 5 5/8 inches and adhered this to my card base using Fast Fuse Adhesive, which has fast become my go to adhesive!

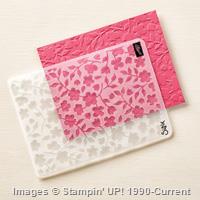
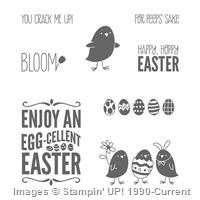
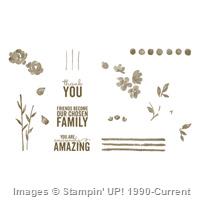
For my card front I took some more Pink Pirouette cardstock and the absolutely gorgeous Bloomin’ Hearts Thinlits Die and die cut my focal piece using my Bigshot. This die is so pretty, you don’t appreciate how pretty until you see it yourself. I adhered this to another piece of Blackberry Bliss cardstock measuring 3 5/8 inches x 5 3/8inches using Multi Purpose Liquid Glue.  Taking some scrap Blackberry Bliss card stock I die cut some of the matching flower pieces. I covered these in some of the Wink of Stella Glitter brush pen and popped these up on some Stampin Dimensionals on to my die cut heart.

20160119_145408_marked

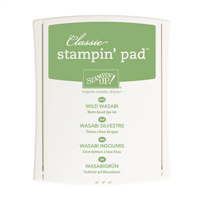
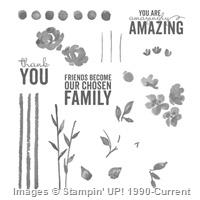
For my sentiment I used the Bloomin’ Love Stamp Set which with the thinlits comes in a Bundle saving you 15%. I stamped my sentiment in Blackberry Bliss Classic Ink onto some Pink Pirouette cardstock and very quickly heat embossed this with my heat tool and some Clear Stampin’ Embossing Powder. Once this was melted I quickly again sprinkled on some embossing powder and heated it again giving a more raised effect. I then covered the heart on my sentiment in Wink of Stella Glitter brush pen.

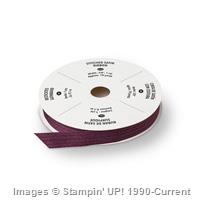
To finish off I wrapped some Pink Pirouette 1/2 inch Seam Binding Ribbon around my card front. Taking my sentiment piece I tied some of the 1/4 inch Cotton Ribbon, in Rich Razzleberry, in to a knot. I popped my sentiment piece up on dimensionals to my card front and adhered this with dimensionals to my card base. Taking some Crystal Effects I covered my flowers and the heart on my sentiment piece to give some more dimension to them.

So that was my swap for this month, and I am looking forward to next months challenge and I hope you will join me by subscribing to my blog. I will too be posting how I made my cardstock swatches that helped me come up with my colour scheme for this card.

So thanks for dropping by, Louise xx


Don’t forget Sale-a-Bration runs from January 5th to March 31st 2016, so plenty of time to place lots of orders and get as many of the free products as you can.  If you spend £45 on any Stampin Up products, these can be from the Spring & Summer catalogue or the Annual catalogue, you qualify for one of the exclusive Sale-a-Bration products.  These are in our Sale-a-Bration brochure.  It doesn’t end there! You can earn a free product for every £45 you spend so if you spend £90 you can order 2 free products and if you spend £135 you can order 3 products!! I know it is fab!!!

It is also an AMAZING time to JOIN Stampin Up, if you have been considering becoming a demonstrator or just want to make the most of the joining offer now is the time to do it and I would be honoured to have you on my team, so click HERE and lets have some Stampin fun together and you can choose £160 worth of Stampin Up products for just £99!!! You then have until the end of June to meet the first required minimum of £270 sales/spend (and believe me it is easy to spend that on just the things you want for yourself!), there really is no better time to JOIN!

Stampin Up Painted Petals Cards Stamped with Embossing Folder

We are now on the big countdown down to the new catalogue launch 2105-2016…..

Which also means that time is rapidly running out to snatch up the remaining items on the retiring list which you can find HERE! But it also means saying goodbye to some of the gorgeous items from the Spring and Summer catalogue that have not carried over to the annual catalogue, these will not be available after 2 June 2015 😦

Painted Petals Cards

Painted Petals Cards

So with that it mind I am dedicating the next few days to products from the Spring and Summer catalogue or the retiring list in the run up to the new catalogue launch.  Saying that, the biggest surprise for me was that the Painted Petals Stamp Set and co-ordinating products have not carried over in to the new annual catalogue. So for my first post I have focused on these products for my cards.

To begin with I made my card bases, I took 4 pieces of A4 Cardstock and cut them in half at 4 1/8 inches and 5 7/8 inches in Wild Wasabi, Rose Red, Pacific Point and Blackberry Bliss, and scored the Rose Red and Blackberry Bliss cards at 4 1/8 inches and the Pacific Point cards at 5 7/8 inches.

To make my embossed background pieces I took 4 pieces of Whisper White Cardstock measuring 3 7/8 inches x 5 5/8 inches. Grabbing my Spring Flowers Textured Embossing Folder (which is currently on the Weekly Deals) and my BigShot I decided to create two different types of background. For my first two pieces I inked the embossing folder, inking up the raised area of my embossing folder, with Rose Red Classic Ink and Pacific Point Classic Ink and ran these through my BigShot embossing and inking the pattern on to my piece of Whisper White.

I decided to do my other two backgrounds slightly different. I inked up my embossing folder in the same way with Blackberry Bliss Classic Ink and Wild Wasabi Classic Ink, but did not run the embossing folder through my BigShot. Instead I applied lots of pressure to my closed folder sandwiching my piece of Whisper White and the ink together. Being very careful opening my embossing folder I now have a stamped background effect, which is really very pretty! I adhered my four backgrounds on to their matching card bases with some Fast Fuse.

For each of my cards using the Painted Petals Stamp Set and co-ordniating ink colours I stamped one of the flower designs and one of the leaf designs, with Wild Wasabi Ink, using my Stamp-a-ma-Jig on to some more Whisper White cardstock. I trimmed this piece down to 3 inches x 2 3/4 inches and taking some matching Painted Blooms Designer Series Paper cut this half an inch bigger than my stamped piece, 3 1/2 inches x 3 1/4 inches. I popped these together and onto my card fron with some Stampin Dimensionals. I also stamped a sentiment from the stamp set for each card in co-ordinating colours and punched these out using the Scalloped Oval Punch, 1 1/4 Inch Scalloped Circle Punch and the Decorative Label Punch.


I popped these up onto matching punched out shapes in matching card stock colours and for the Pacific Point and Blackberry Bliss cards I added some Dazzling Diamonds Glimmer Paper also punched out. For the Rose Red card I used some of the Champagne Glimmer Paper which is also retiring!! I popped all these on with some Stampin Dimensionals. For my final touch I used some Basic Pearl Jewels for the flowers and on the sentiement pieces.

I think surprisingly, although I love Blackberry Bliss and all the Blue colours, my favourite is the Wild Wasabi card! And I am not a fan of green! So let me know in the comments below which is your favourite and I hope I have inspired you to try out something different with your embossing folders and to also get in your last minute orders before the 2 June!!

Be quick and pop over to my Shop HERE!!!

Thanks for stopping by today xx


Supply List

Built for Free Using: My Stampin Blog

Make it Monday Stampin’ Up Sale-a-Bration Irresistibly Yours Note Cards

For todays Make it Monday I am breaking out the beautiful Irresistibly Yours Speciality Designer Series Paper, for me it has been the highlight of this years Sale-a-Bration promotion and as this comes to an end on the 31st March, yes just next Tuesday!! That will be the last day you can qualify for free products for every £45 you spend on Stampin’ Up products and the last time you can get your hands on the beautiful Irresistibly Yours DSP.

Now you know I love sponging colour on to this DSP so well that’s what I have done.  I have made a set of 6 3×3 notecards each with a different colour combination. Some I like and some I am not so keen on.

SAB Irresistibly Yours Note Cards

SAB Irresistibly Yours Note Cards

Each notecard is a piece of Whisper White Cardstock cut down to 6 inches x 3 inches and scored at 3 inches.  The Irresistibly Yours DSP is cut down to 2 3/4inches x 2 3/4 inches.  For my sentiments I used the Sale-a-Bration Simply Wonderful Stamp Set.

Irresistibly Yours Notecards

Irresistibly Yours Notecards

For my first three notecards I used Daffodil Delight and Tangerine Tango Classic ink and stamped the “Congrats” sentiment from the stamp set on some Whisper White cardstock with some Memento Tuxedo Black Ink, and then punched it out with the Large Scalloped Oval Punch.  Then I used Strawberry Slush and Smoky Slate Classic ink and stamped the “Thanks so very much” sentiment on to some Whisper White cardstock and cut this into a banner shape.  For the third card I used Pistachio Pudding and Crisp Cantaloupe Classic Inks and stamped the sentiment “so happy for you”  on some more Whisper White and also cut this into a banner shape.

SAB Irresistibly Yours Note Cards

SAB Irresistibly Yours Note Cards

For my other three note cards I used Blackberry Bliss and Daffodil Delight Classic Ink (this turned out lovely) and stamped the “you’re the best” sentiment and punched it out with the Word Window Punch. On my next card I used Melon Mambo and Tempting Turquoise Classic Ink and stamped the sentiment “You’re simply wonderful” and again punched this out with the word window punch. For the last card I used Baked Brown Sugar and Lost Lagoon Classic Ink and stamped the “to a great friend” sentiment and used the large scalloped oval punch again to punch it out. I adhered all my pieces of DSP on to my card fronts with snail adhesive and popped my sentiments up with Stampin Dimensionals.

SAB Irresistibly Yours Card

SAB Irresistibly Yours Cards

So which combination is your favourite? Or what combinations are you going to try?

Thanks for dropping by, Louise xx

So feeling inspired!? Why not pop over to my shop and grab yourself some Free goodies while Sale-a-Bration lasts, CLICK HERE!!!

Don’t forget Sale-a-Bration runs from January 6th to March 31st 2015, so plenty of time to place lots of orders and get as many of the 10, yes 10, free products as you can.  If you spend £45 on Stampin Up products, these can be from the Spring & Summer catalogue or the Annual catalogue, you qualify for one of the exclusive Sale-a-Bration products.  These are in the Sale-a-Bration brochure highlighted “FREE”.  It doesn’t end there! You can earn a free product for every £45 you spend so if you spend £90 you can order 2 free products and if you spend £135 you can order 3 products!! I know it is fab!!! You can also qualify for even more, if you spend over £150 you can get £25 to spend on anything you like from any of the catalogues!!!


Supply List

Built for Free Using: My Stampin Blog

Seasonal Sunday Stampin’ Up Happy, Hoppy Easter Card

I thought I would use my Sunday posts to showcase my projects I make for the current season or any upcoming holidays, hopefully I can inspire you by using some of the current seasonal products in the current catalogues.

There is no denying Easter is on its way, its all chocolate and bunnies everywhere you look, so for this weeks Seasonal Sunday I am getting in the Easter spirit which is not too far away now!!  Its all about the eggs today with my “Happy, Hoppy Easter Card”.

Happy, Hoppy Easter card!

Happy, Hoppy Easter card!

For my card base I used a piece of A4 Pistachio Pudding Cardstock cut at 5 7/8 inches and scored at 4 1/8 inches.  My card front is a piece of Whisper White Cardstock cut to 5 5/8 inches x 3 7/8 inches.  On which I drew a diagonal line three quarters of the way up the card.  I then took the row of eggs image from the For Peeps Sake Stamp Set and stamped in rows all the way down the card in Pistachio Pudding, Hello Honey, Crisp Cantaloupe and Soft Sky Classic Inks.  I also stamped some extra images on a spare piece of Whisper White cardstock.

Seasonal Sunday Easter Card

Seasonal Sunday Easter Card

Taking some Hello Honey Cardstock and the Little Letters Alphabet Dies I die cut the letters Easter using my BigShot.  I then cut down a piece of the Best Year Ever Designer Series Paper from the Sale-a-Bration promotion, these papers are free as part of the promotion with a free item for every £45 you spend (details below).  I adhered my letters to the piece of DSP and placed the For Peeps Sake sentiment and the Happy Hoppy Easter (partially inked) on my block together to make my full sentiment and I stamped this is Blackberry Bliss Classic Ink.  I popped this up on my card front with Stampin Dimensionals.  Taking my extra egg images I cut a few random ones out and popped them up on to my card front as well on the coordinating coloured eggs.  I adhered this piece to my card base with Stampin Dimensionals.

For Peeps Sake Happy Easter!

For Peeps Sake Happy Easter!

For the inside I cut a piece of Whisper White Cardstock to 5 5/8 inches to 4 1/8 inches and stamped the 3 chicks image in Pistachio Pudding ink.

For Peeps Sake Easter Card

For Peeps Sake Easter Card

There we go my Seasonal Sunday Easter Card, and no I didn’t eat the eggs they were purely for demonstration reasons only 🙂

Thanks for hopping by, Louise xx

So feeling inspired!? Why not pop over to my shop and grab yourself some Free goodies while Sale-a-Bration lasts, CLICK HERE!!!

Don’t forget Sale-a-Bration runs from January 6th to March 31st 2015, so plenty of time to place lots of orders and get as many of the 10, yes 10, free products as you can.  If you spend £45 on Stampin Up products, these can be from the Spring & Summer catalogue or the Annual catalogue, you qualify for one of the exclusive Sale-a-Bration products.  These are in the Sale-a-Bration brochure highlighted “FREE”.  It doesn’t end there! You can earn a free product for every £45 you spend so if you spend £90 you can order 2 free products and if you spend £135 you can order 3 products!! I know it is fab!!! You can also qualify for even more, if you spend over £150 you can get £25 to spend on anything you like from any of the catalogues!!!

Supply List

Built for Free Using: My Stampin Blog

Technique Thursday Stampin Up Painted Petals Embossed Card

Thursdays posts will be somewhere I will be showcasing a technique or two.  From some of the new trendy ones that are popping up in the crafting world, to some of the good old favourites.  For todays post I have gone with embossing with a Textures Impressions Folder.  I always think they look so pretty so I buy them then never use them so my posts will encourage me to think out of the box and use some of the lovely things I buy but never get round to using.

Technique Thursday Painted Petals Card

Technique Thursday Painted Petals Card

For todays card base I used Soft Sky A4 Cardstock cut at 5 7/8 inches and scored at 4 1/8 inches.  I then cut a piece of the adorable Painted Blooms Designer Series Paper to 5 5/8 inches x 3 7/8 inches and adhered this to my card base with snail adhesive.  I then took a piece of Blushing Bride A4 Cardstock and cut it to 5 5/8 inches x 1 1/4 inches, I then ran this through my BigShot with the Spring Flowers Textured Impressions Folder.  I took a small piece of Whisper White Cardstock measuring 2 inches by 1 1/2 inches and stamped the gorgeous sentiment from the Painted Petals Stamp Set in Blackberry Bliss Classic Ink, I then adhered this to my card front and popped my embossed piece over it.  I finished the edge of the two pieces off with a piece of Stitched Satin Ribbon in Blackberry Bliss.  The last final touch to my card front was a few Candy dots from the brights collection.

Painted Petals Embossed Card

Painted Petals Embossed Card

For the inside I simply popped in a piece of Whisper White Cardstock and stamped the small stem image in Wild Wasabi Classic Ink and topped it with the coordinating flower image in Blackberry Bliss.

Painted Petals Card - Inside

Painted Petals Card – Inside

So for a lovely spring day and lovely spring card!!


Thanks for droppoing by, louise xx

So feeling inspired!? Why not pop over to my shop and grab yourself some Free goodies while Sale-a-Bration lasts, CLICK HERE!!!

Don’t forget Sale-a-Bration runs from January 6th to March 31st 2015, so plenty of time to place lots of orders and get as many of the 10, yes 10, free products as you can.  If you spend £45 on Stampin Up products, these can be from the Spring & Summer catalogue or the Annual catalogue, you qualify for one of the exclusive Sale-a-Bration products.  These are in the Sale-a-Bration brochure highlighted “FREE”.  It doesn’t end there! You can earn a free product for every £45 you spend so if you spend £90 you can order 2 free products and if you spend £135 you can order 3 products!! I know it is fab!!! You can also qualify for even more, if you spend over £150 you can get £25 to spend on anything you like from any of the catalogues!!!

Saturday Sketch Day Stampin’ Up Petal Potpourri Card

For Saturdays posts I have decided to use this as an opportunity to take part in some sketch and card challenges.  I have always wanted to take part in challenges but have never got around to it so I am hoping this will encourage me to do so, whether it is a sketch challenge or a theme challenge I think it is a good way to keep the inspiration flowing.

This week I have taken part in the Freshly Made Sketches Challenge.

Sketch Challenge 177

Sketch Challenge 177

For my entry this week I used the Petal Potpourri Stamp Set from the Spring and Summer Catalogue and created a Mother’s Day card for my daughter to send to my mum this Mother’s Day.

Petal potpourri Mother's Day Card

Petal potpourri Mother’s Day Card

I took a piece of A4 Blackberry Bliss Cardstock and cut it down to 8 2/8 inches (20.8cm) x 5 7/8 inches (14.4cm) and scored it at 4 1/8 inch (10.4cm) to make me card base.   To make my mat piece I took a piece of the In Colours 2014 – 2016 Background Designer Series Paper  in Blackberry Bliss and cut it to 5 3/8 inches (13.4cm) x 3 7/8 inches (9.3cm) and adhered this on to my card base with some snail adhesive.  I then took another piece of Blackberry Bliss (love this colour!!) measuring 5 1/8 inches (12.9cm) x 3 5/8 inches (8.8cm) and cut it at 1 inch and then cut half an inch of the remaining piece, so I now have 2 pieces.  I adhered this to the card base with Stampin Dimensionals leaving the half an inch gap in between.

Blackberry Bliss Petal Potpourri Card

0 Blackberry Bliss Petal Potpourri Card

Taking the co-ordinating Flower Medallion Punch I punched out a flower from the Blackberry Bliss Background DSP.  I stamped one of the flower images from the Petal Potpourri Stamp set in Versamark Ink and heat embossed this with White Stampin Embossing powder.  I too punched this out with the Flower Medallion punch and stuck them together with Mini Glue Dots.

Petal Potpourri Card

Petal Potpourri Card

Taking a strip of A4 Vellum measuring 3 1/2 inches (8.8cm) x 3/4 inch (1.9cm) I stamped a sentiment in Versamark Ink and heat embossed this again with Stampin White Embossing powder.  I adhered this to my flower piece with a glue dot and in the centre of the flower added a Something Borrowed Embellishment with another glue dot.   I then adhered my flower to my card with Stampin Dimensionals.

For the inside I took a piece of Whisper White cardstock  3 7/8 inches x  5 3/8 inches (9.3cm x 14.3cm) and stamped a sentiment in Blackberry Bliss Classic Ink and popped this on the inside of my card.


Petal Potpourri Mother's Day Card

Petal Potpourri Mother’s Day Card

So that’s this weeks entry into the Freshly Made Sketches challenge I hope this inspires you to have a go!

Thanks for dropping by today, Louise xx

So feeling inspired!? Why not pop over to my shop and grab yourself some Free goodies, CLICK HERE!!!

Don’t forget Sale-a-Bration runs from January 6th to March 31st 2015, so plenty of time to place lots of orders and get as many of the 10, yes 10, free products as you can.  If you spend £45 on Stampin Up products, these can be from the Spring & Summer catalogue or the Annual catalogue, you qualify for one of the exclusive Sale-a-Bration products.  These are in the Sale-a-Bration brochure highlighted “FREE”.  It doesn’t end there! You can earn a free product for every £45 you spend so if you spend £90 you can order 2 free products and if you spend £135 you can order 3 products!! I know it is fab!!! You can also qualify for even more, if you spend over £150 you can get £25 to spend on anything you like from any of the catalogues!!!

Blackberry Bliss A4 Cardstock

Blackberry Bliss A4 Cardstock

Blackberry Bliss Classic Ink

Blackberry Bliss Classic Ink

Something Borrowed Embellishments

Something Borrowed Embellishments

A4 Vellum

A4 Vellum

Mini Glue Dots

Mini Glue Dots

Stampin' White Embossing powder

Stampin’ White Embossing powder

Versamark Ink

Versamark Ink

Flower Medallion Punch

Flower Medallion Punch

2014 - 2016 Backgrounds DSP

2014 – 2016 Backgrounds DSP

Petal Potpourri Stamp Set

Petal Potpourri Stamp Set

Stampin Dimenstionals

Stampin Dimenstionals

Stampin’ Up Sale-a-Bration Irresistibly Yours and One Tag Fits All Card Series It’s True

So Day two of this little series/love affair with the Sale-a-Bration Irresistibly Yours Speciality Designer Series Paper from the SAB catalogue. I am so happy, my first ever card series!!

Today I decided to try blending three shades of one colour so I grabbed my Blackberry Bliss, Perfect Plum and Wisteria Wonder Classic Ink pads and got sponging with my Stamping sponges, moving from the darkest to lightest shade and blending into each other.

SAB It's True Card

SAB It’s True Card

For my card base I used a piece of A4 Perfect Plum cardstock cut at 5 7/8 inches (14.8cm) and scored at 4 1/8 inches (10.5cm) to which I adhered my piece of beautifully coloured DSP measuring 5 5/8 inches x 3 7/8inches (14.3cm x 10cm).

I pulled out my One Tag Fits all Stamp Set and my Note Tag Punch.  I punched a tag from some Whisper White cardstock and some Wisteria Wonder cardstock. I stamped the “It’s True I Love You” image onto the Whisper White tag and offset layered this onto my Wisteria Wonder tag and finished this with some Blackberry Bliss Stitched Satin Ribbon. I finished the tag with some Basic Rhinestones Jewels and popped it on to my card front.

SAB It's True Card

SAB It’s True Card

For the inside I kept it pretty simple, just a piece of Whisper White cardstock measuring 5 5/8 inches x 3 7/8 inches (14.3cm x 10cm) on to which I stamped some small hearts from the ever so versatile Perpetual Calendar Stamp Set which is a must have in my opinion, mind you lots of things are! I used the three ink colours again and used the stamping off technique.

SAB It's True Card

SAB It’s True Card

Hope you enjoyed my second outing with the Irresistibly Yours DSP, see you tomorrow!

So feeling inspired!? Why not pop over to my shop and grab yourself some Free goodies, CLICK HERE!!!

Don’t forget Sale-a-Bration runs from January 6th to March 31st 2015, so plenty of time to place lots of orders and get as many of the 10, yes 10, free products as you can.  If you spend £45 on Stampin Up products, these can be from the Spring & Summer catalogue or the Annual catalogue, you qualify for one of the exclusive Sale-a-Bration products.  These are in the Sale-a-Bration brochure highlighted “FREE”.  It doesn’t end there! You can earn a free product for every £45 you spend so if you spend £90 you can order 2 free products and if you spend £135 you can order 3 products!! I know it is fab!!! You can also qualify for even more, if you spend over £150 you can get £25 to spend on anything you like from any of the catalogues!!!

Thanks for dropping by, Louise xx

Perpetual Calendar Stamp Set

Perpetual Calendar Stamp Set

Basic Rhinestone Jewels

Basic Rhinestone Jewels

Blackberry Bliss Stitched Satin Ribbon

Blackberry Bliss Stitched Satin Ribbon

Perfect Plum A4 Cardstock

Perfect Plum A4 Cardstock

Wisteria Wonder A4 Cardstock

Wisteria Wonder A4 Cardstock

Perfect Plum Classic Ink

Perfect Plum Classic Ink

Blackberry Bliss Classic Ink

Blackberry Bliss Classic Ink

Wisteria Wonder Classic Ink

Wisteria Wonder Classic Ink

One Tag Fits All Stamp Set

One Tag Fits All Stamp Set

Stamping Sponges

Stamping Sponges

Stampin' Dimensionals

Stampin’ Dimensionals

Note Tag Punch

Note Tag Punch

Irresistibly Yours Designer Series Paper

Irresistibly Yours Designer Series Paper

Sale-a-Bration Catalogue

Sale-a-Bration Catalogue

Spring & Summer Catalogue

Spring & Summer Catalogue

Annual Catalogue

Annual Catalogue

Whisper White Cardstock

Whisper White Cardstock

DIY Stampin’ Up Personal Organiser/Filofax Dividers

It appears that I may have found something amazing out about the Stampin Up paper stacks, well other than they come in some fabulous colours and patterns, they are the perfect size to make dividers for your chosen personal organisers (size personal or pocket as you will read below!).

Moonlight designer series paper stack

Moonlight designer series paper stack

To fashion my creations I decided on the Moonlight Designer Series paper stack from our Annual Catalogue which features the Stampin’ Up colours Basic Grey, Blackberry Bliss, Hello Honey, Lost Lagoon, Sahara Sand and Whisper White.  I chose two sets of five different papers, mainly featuring one of my favourite colours from the In Colours 2014-2016, Blackberry Bliss, but along with others such as Hello Honey and Sahara Sand.

I used the existing dividers in my planner and traced around these on the back of which piece I wanted to be facing front.  I did this lightly in pencil so it could be easily erased.  It sounds time consuming but with the Stampin’ up Designer series paper stacks it really isn’t and there is not much waste and cutting them out is a breeze as again there is not much to cut out from!!! Perfect! (However, my daughter, never one to miss out, has a pocket planner for school and I made some for her and the size was pretty good for these too.)


Why did I do two sets I hear you ask?? Well I could not decide on only five pieces of designer series paper that I liked and as they really did not take that long I made two sets so I can swap them in and out as I please.

I did laminate mine but with the quality of the designer series paper stacks this is not essential it is just that my planner and handbag get some serious treatment (plus I have  slight OCD traits so I like things that I can wipe clean).

So that is it really a super quick fun way to personalise and funky up your personal organisers!

If you are interested in any of the products shown you can click HERE and have a look at what you like the look of!

Don’t forget Sale-a-Bration runs from January 6th to March 31st 2015, so plenty of time to place lots of orders and get as many of the 10, yes 10, free products as you can.  If you spend £45 on Stampin Up products, these can be from the Spring & Summer catalogue or the Annual catalogue, you qualify for one of the exclusive Sale-a-Bration products.  These are in the Sale-a-Bration brochure highlighted “FREE”.  It doesn’t end there! You can earn a free product for every £45 you spend so if you spend £90 you can order 2 free products and if you spend £135 you can order 3 products!! I know it is fab!!! You can also qualify for even more, if you spend over £150 you can get £25 to spend on anything you like from any of the catalogues!!!

Thanks for dropping by today xx